Showing posts with label distress ink. Show all posts

Friday, 13 January 2012

Seeing Red at The Stampman

Evening all!  Finally made it online lol!  I'm cutting it close aren't I!  I've nodded off a couple of times as the bed is soooo warm and my lad has got in making it even more attractive to cuddle up and zone out.  Had to stay awake as I was bidding on something on ebay and wanted to make sure I got it lol!  I don't use fancy bid thingies I like the thrill of the chase :)  Got one of the dance mats for the wii the other day but no game so I was looking at the game for it with an extra mat as Ethan loves playing with me so finally got it yay!

Anyhow over to my challenge for you at The Stampman this fortnight and I have set you a task of using RED, either a little or preferably a lot..

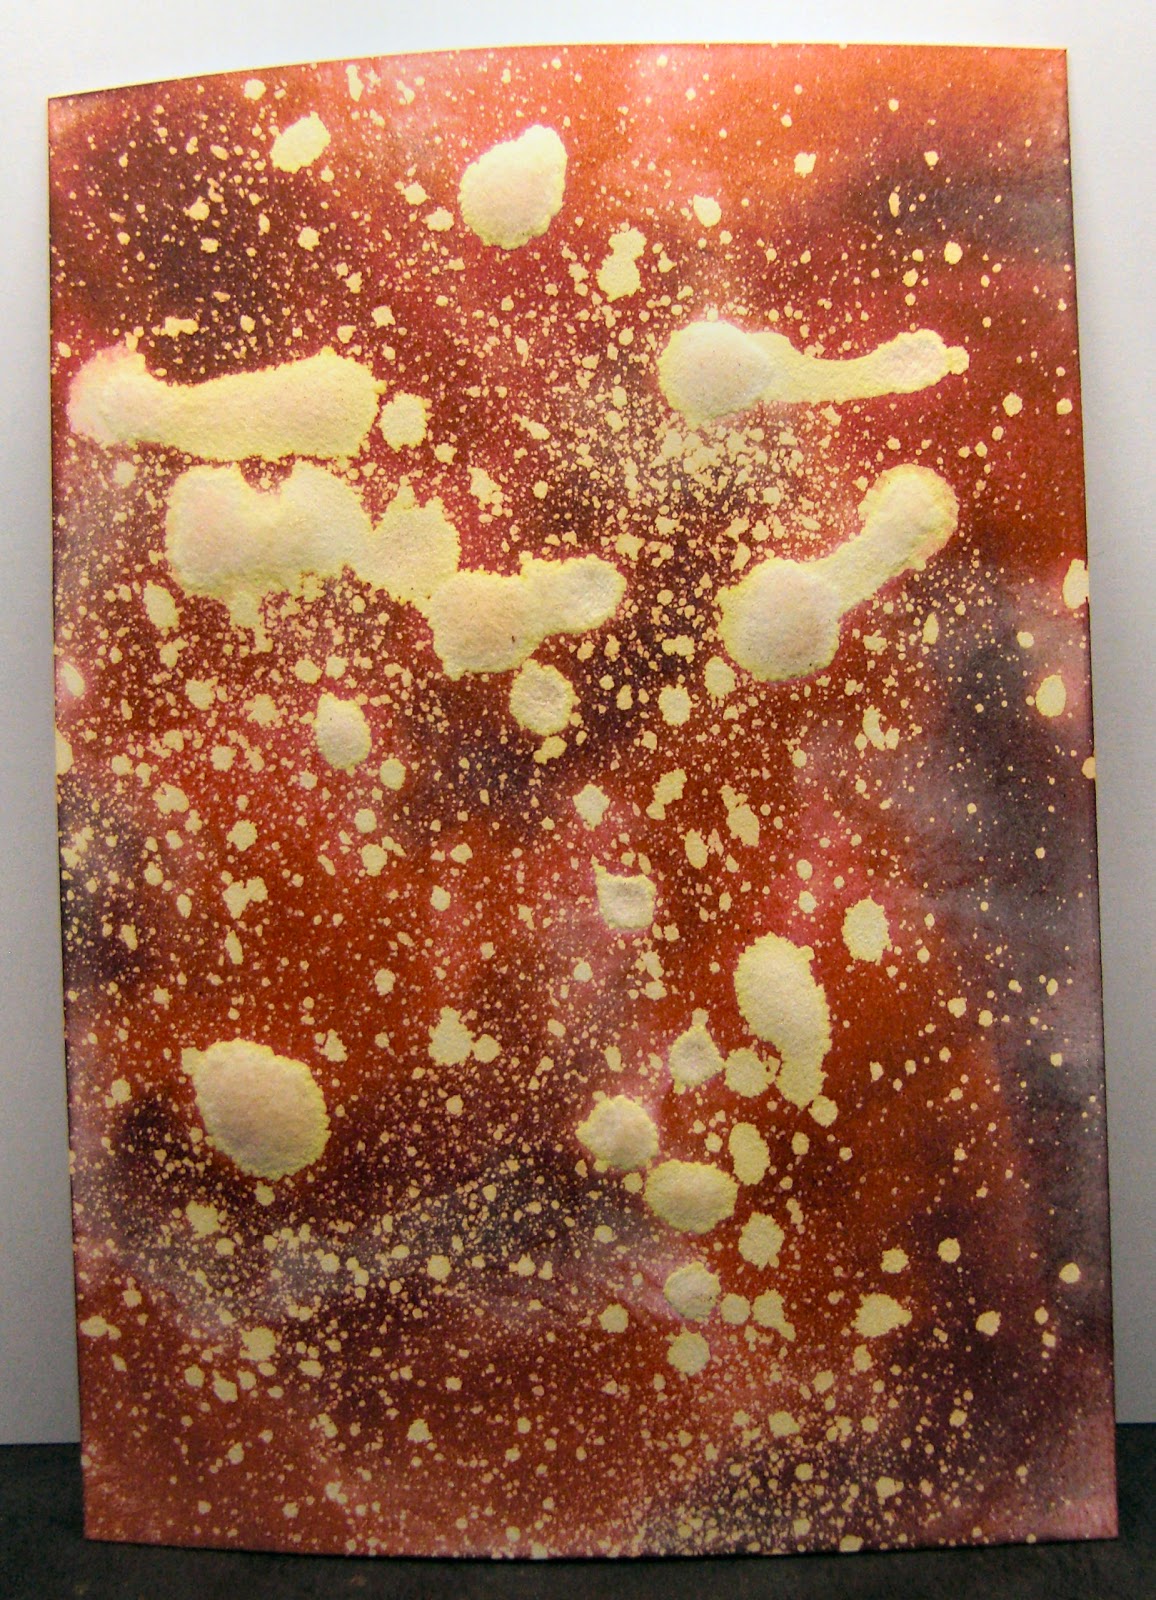
I had a little play around with techniques the other day and used sponges to put fired brick and black soot distress ink onto card then dipped an old toothbrush into bleach then flcked the bristles which is the piece I used at the back.  I used parazone which is a tad harsh lol!

The embossed piece I swiped the inkpads direct to the card, they came out much darker then dried t with a heat gun and used the divine swirls cuttlebug folder and the image is from my new set of stamps which was part of my birthday treat off OH and thats Aspects of Design 60 - Classical Instruments.  I've stamped and embossed with moonglow midnight ruby then using the blending tool added distress ink from the outside inwards and any bits I went over I bleached out.  Its mounted on silver holographic card with some black organza ribbon and sticky gems to finish.

Hope you can come over to the challenge and show me some red!


Here's the backing one I showed other day, ink up your card then dip an old toothbrush in some bleach and pull the bristles back over the card.  You may want to tap off excess bleach first or you get big blobs like this (or you may like that!)  WATCH YOUR CLOTHES!


I'd also like to enter into the following challenges...

Crafty Catz - SOmething new (Stamps)
Gingersnap - Spicy supply challenge - Ribbon
Top Tip Tuesday - Anything goes

Wednesday, 11 January 2012

Headache

Uuurgh had terrible head ache today, I think its a low pressure one as it started just before the rain.  I'm just editting the photies for the jeans tutorial which will be posted tomorrow and we'll cover pale colours too as they can be difficult (unless you know how!) so toodlie pip for tonight and I'll post again tommoz...

Oooh little pic to share of a project for friday, this one is red and black distress inks then a toothbrush (an old one!) dipped in bleach and flicked, kinda reminds me of the milky way so will have to do a blue version!  I'm playing around with techniques to do the postcard swap as we're getting our partners soon, ooh exciting!


Nighty Night!

Friday, 25 March 2011

Anything Sir T!m of Holtz goes at The Stampman

Theres a new challenge at The Stampman this fortnight and we'd like to see Anything Tim!  For this I used quite a number of Tim's products, I don't have any stamps so improvised!
I started with a box canvas Ive had for about 3 years lol!  I built up some colour with distress inks in broken china and wild honey which make a lovely green when mixed and dried with a heatgun between coats.  I've added streaks of acrylic daubers again drying then used the flourish die cut as a stencil and applied gold painty swirls.  The corners are distress crackle paint and I've literally thrown some white pearl paint on and heated till it bubbled (I was outside in the sunshine with my heatgun btw!)  Added some black dots with sequin waste.

The embellishments are quite personal.  The key is from one of my MANY house moves when I just want to stay put.  The mini domino is from my huge collection of various shapes and sizes, I'm always looking in charity shops for old ones :D  The flowers I pressed myself, they're proper naff but I love them coz they're so naff.  The buttons were white and I altered them with distress ink and I had to add the shrink plastic at the bottom to give Janey and Jill a laugh.  I'm RUBBISH at shrink plastic and these were an attempt (or 3) of shrinking one of tim's flourishes.  I thought I'd include them as well why not, I'm rubbish at it and this canvas is quite personal.  I dont have a lot of altered nick nacks and this is my first go so be gentle lol!
Heated acrylic making it bubble and giving texture


The crackle paint, thrown on paint and naff flowers :)
And my rubbish shrink plastic, I thought they deserved a place :)

Tim Holtz/Sizzix flourish die (Used as stencil and rubbish shrink plastic)


So come on girls and guys, drag that Tim stuff out and show The Stampman what you're made of!

Thursday, 27 May 2010

A Touch of Pink

Isn't that a perfume?

I was in a really simplistic mood today and that included colours too so I went for my greyscale which I luuurve doing and added just touches of pink here and there. I've used my Ice Greys set of promarkers with pale pink as the touch, and my beloved blender.

The image is "Red Hearts" by sweet pea stamps and is from Crafts and Me here. Before I was on the DT I contacted Teresa about this one saying please please please with sugar and cherries on the top save me one of these when back in stock as she's just stunning and great fun to colour. There's lots of large areas on this and not too fiddly bits, havent coloured her in traditionl red/black yet as I'm still playing with her :)

ANyways yes, I've coloured with promarkers adding sparkly bits with a sakura stardust pen (clear) added sticky gems in clear iridescent and black for the buttons, black nailheads across the centre and heart shaped sticky pearls at the bottom. The black panel is cuttlebuged with jules jewells embossing folder and the pink layering is coloured with worn lipstick distress ink as is the labels 4 nesties panel.
The mirror I paperpieced with holographic silver paper. Now it wouldn't be me if it didn't sparkle a bit so I've used a glue pen and glamour dust on the gloves and bodice.

Entering this into....

Passion for Promarkers - Anything goes (Entry 2)
Flutterby Wednesday - Open week
Quixotic - Embossing
Cute card thusday - No dp's
The Secret Crafter - No Patterned paper


Thanks for looking! Love all your comments too, much appreciated x

Monday, 3 May 2010

Crafty Cardmakers #20 - Distressed!

Our challenge this fortnight over at Crafty Cardmakers is a nice easy one (for some!) which is to use some kind of distressing. I think the team have pretty much covered most techniques or you can always have an evening in with Sir Tim and you tube watching the ranger channel here!

We are also joined by a very special guest amongst the cardmaking elite (or boss lady to me!) Mrs Stampman - Jill Tuck who are also kindly sponsoring us!

For this challenge I have gone back to a very old favourite of mine called Celestial Dreams by Stamp Oasis. I call her my lucky stamp as whenever I submitted a card to a mag using it I was published and whenever I entered into a competition I won, its paid me back 20 fold :D I have several of this range of stamp as they're all so pretty and very Vixy!

OK I shall start with the background which I used distress inks by swiping spun sugar over the card then dabbing pumice stone and victorian velvet direct to the paper then just to spread the ink out a little I used a water spray which I'd mixed with mica magic gold reinker for some sparkle (I can't help it my cards NEED sparkle!)

The cuttlebug background I made with the victorian velvet, embossed it then swiped the pumice stone inkpad over the embossing (and sprayed again!) The text at the bottom is by funstamps which is on crumpled paper swiped with an inkpad (spun sugar) then swiped again with victorian velvet very lightly, sprayed and ironed.

Image was coloured with promarkers with lots of sakura stardust as highlights and I've used gold leafing foil on the stars and glamour dust on the moon. I've also used the distress inks to do the colour streaking around the image although I've snapped both ends of my colorbox stylus and all my tips have fallen off as I'm quite heavy handed so I had to use cut n dry foam which doesn't quite give it the same wow (Guess what I'm after at Port Sunny!) Its based on the stampscapes streaking technique you'll find here!

Also entering into...

Quixotic Paperie - How Distressing!

Lots to do - Faces

Thanks for looking!


Thought i'd also show you what my little un has been up to today. We got a Betty Crocker cake mix, started as a disaster as I was getting the things out for Ethan and literally turned my back for 2 seconds to get a fork and he dropped a box of 6 eggs everywhere aaargh! Firtunately I had another pack so he managed to get on with it very well and wasd absolutely pleased as punch when it came out of the oven and waited patiently for it to cool so he could decorate it bless him! He absolutely loves cooking and has his own custom made apron which my friend Emma makes although he'd taken it off for the pic. After his tea when we could all have some he thinks its a birthday cake so started singing happy birthday awwww!


Thursday, 8 April 2010

My Arty Journal Page

I've been pondering over this art journal page for a couple of weeks now and originally I tried doing it in acrylics as that seems the done thing and I struggled. I realised what was bothering me was the materials, they weren't ME. I couldn't express something as personal as an art journal page using things that were impersonal to me so I ditched it and went with what I know and what works for me whether thats conventional or not because I'm not the most conventional of folk.

In this case I went with distress inks, a splash of moonshadow, a misting of radiant rain, a splodge or two of gesso and good old ink.

What did I want to write about is my next challenge and following the thought of changing materials as they were more me I went with how others may view me and how I view myself so I've stamped the eyes from Tracey Coates' Alluring ladies sheet which is of course from The Stampman. I use this as a blog header as its distinctive and it took me an hour to colour and I'm very pleased with the result :)

I've used distress inks and moonshadow ink to colour the page and swiped some gesso here and there and added a band of an old book gessoed and distressed across the centre. After I stamped and embossed the eyes I left it for a bit of pondering and the words from the same stamp sheet were jumping out at me and I thought well I don't have ANY of them! Anyone who actually knows me personally (and only the very brave few stick me out!) will agree I'm not in the slightest bit elegant, graceful, glamourous, don't have flair and most certainly don't have any sense of style.
My favourite shoes are black CAT boots which are a bit like steel toe caps without the steel. OK I've added bright pink laces to mine.
I've reflected this by using Helitrope purple plum starburst stains (From the Japanese gardens set) which is like a hot pink with a purply tint. The embossing is midnight teal, another firm favourite. I've also added the flying heart from the Artistic Elements sheet because I think its just fabulous and reflects my love of art & craft and the sentiment is also from there.
So here's a little page about me and my unconventional self complete with sparkly bits :)


Friday, 2 April 2010

Very Vintage

I've gone all vintage today wanting to play with my distress inks and moonshadows :) Made some backgrounds yesterday so I chose a nice area of one I'd used greens, red and brown distress inks on and stamped the keys from Tracey Coates' new "Artistic Elements" sheet and embossed with Moonglow Midnight emerald. I've painted inside the two outer keys with a yellow H2O paint to make them stand out and stamped some swirls in the corner which are actually part of the flying heart off the same sheet.
I've attached a chain to the sentiment at the bottom which are two stamps from the sheet, mos of the sentiments can be used inside this frame. I've mounted the top panel on 3d foam so that the sentiment moves and I've also added a little key charm painted with alcohol inks to blend in more.
The bottom pic shows the card tilted and the moonglow effect, midnight embossing powders are black but change colour when tilted so this one is midnight emerald. The stamps in this set can be seen further down the post.


vix

Tuesday, 5 January 2010

Dewdrop Craftz #5 - New Year New You

The challenge set this fortnight at Dewdrop craftz is "New Year New You" so interpret as you wish such as a new technique. I've chosen to make a start on a new art journal. I had a lot of anxiety over it, ummed and ahhed of how it should look or not but you know and art journal is YOUR book, your pages so do with them as you please and simply go with the flow :D
I also had some fab guidance and direction from Sarah over at The Art of Moodling so got stuck in and sprayed and dropped and swirled and just played. These pieces were done with distress inks in spiced marmalade and faded denim on a craft mat, sprayed some solar gold radiant rain then some water to mingle them all then layed over some watercolour paper. Did this a few times till Iwas happy then whilst the corners were wet I dropped in some walnut crystals and dried them off.
After the pieces were dry I randomly pushed some gesso over to tone down some places and dried that off too then started stamping firstly the dragon in the background then the swirls and the large letters (which are done with acrylic dabbers) Then I've stamped and embossed some fireworks. The stamp is by anitas and its absolutely pants, sorry have to say it. Its always left halos no matter how careful you are *but* in this case I particularly wanted them there so used it. I've added some text and highlights with a white souffle pen.

And finally onto the image which is Kimono 2 digital by Dewdrop Craftz coloured with promarkers, I went again for the blue and orange theme to match the distress inks. The reason I chose this stamp is that its the very first page in my journal and I did it on New Years Day (started at 1am actually lol!) We'd just been outside watching loads of chinese wish lanterns floating by and seeing all the fireworks. I've put orange dots using a paint thats like liquid pearls and added some glamour dust. Also my choice of image is the way she's hiding part of herself which is very much like me personally so its new year new me :)

I did umm and ahh about embellishments but I'm not particularly an embellishment person, I like to put the work into backgrounds and colouring so this is quite reflective of my personal style :)


Hope you can join us over at Dewdrop Craftz challenge You do need to use one of their images and there are freebies available too to try!

Friday, 14 August 2009

Time for something vintage :)

Oh how chuffed was I to see the theme at stampin' for the weekend is days gone by! I love love love doing aged, vintage type cards with modern materials (starburst stains!)
Also at The Pink Elephant this week their challenge is to use Turquoise, Brown & neutral.
Also entering for the Allsorts challenge which is vintage.

Background paper is a vintage green which I distressed with scissors and distress ink (vintage photo) and the vertical panel is made with SS in turquoise, brown and a touch of green. I just blew it around with the heat gun in puddles and added more until I got a nice pattern then chucked it through the cuttlebug :) The horizontal panel is SS in opal sea oats with some sprays of moonshadow ink in pirate plunder gold. The image is stamped with moonglow midnight sapphire on SS in turquoise and brown and the edges distressed with distress ink in faded jeans is it called? Not sure but its the same colour as Molly's eyes! Text is stamped on moonshadow ink, flowers have been distressed and the leaves already were!
I'm happy, I got inky messy fingers and I managed to get it ourt in the post all in the same day whoop go me!

Not sure what the stamp is called but it was a simple expressions plate.


Saturday, 25 July 2009

My 1st digi stamp and friday sketchers

Now this is a new concept to me! This is actually a digital stamp. I've never got into them at all before because me+printer=do not get on! Thats why I never print inserts either because I dont get along with printers haha! Anyway after some fab direction from Teresa on crafty cardmaking I looked at them a little more, but that was it I looked!
This week I joined a group onpapercraft planet called Copic Buzz and one of the challenge cards was just so stunning and I mean stunning I had to find out more! The maker, Scrappinnana was so helpful and told me this gorgeous girl was a digital stamp by Victoria Case stamps. She only cost $3 and delivery is instant and freeeeee!

I hot footed it to hobbycraft to purchase some Bristol Board as recommended by my dear friend Sheilakins who is the fountain of all knowledge lol! Printed this little beauty out and went to colour and oh no disaster struck! It kept smudging, I tried everything even heat setting to no avail! Sheilakins kindly phoned me and we checked I had the right card, yep, tried all different settings and decided I was going to try another printer and hey presto problem solved!

I looked at the challenge on Friday sketchers which is a pretty sketch and to use some shimmerz which I dont have so I have used sakura sparkle clear on the wings which doesnt show up at all! It just looks white but its glittery!

The ragged distressed look was inspired by Rowena crafty pagan who has just made the DT at sugar nellie, wow well done! I love the look of her work as she doesnt seem to use loads of expensive accessories.

So this card is thanks to Teresa, Sheila, Scrappinnana and Rowena lol!

All papers ar K&Co and I distressed the edges with scissors then went round the edges pushing some ink in towards the centres with cut n dry foam. Image is Kayla by Victoria Case stamps coloured with copics. The flowers are 3d with a little distress ink (old paper) to take away the glare from the white card.

Thanks for lookin!

Truly Scrumptious #12

This is for the Truly Scrumptious challenge 12 which is a gorgeous sketch by Heather. Ive been in a distressing mood today (see next post!) so started with the base layer which had ragged edges then I crumpled it up, opened out again and swiped over with a distress ink pad. The other layers are made without the crumpling, just with the ragged edging and swiping with distress ink. Daisy is coloured with copics and the flowers are from a design called Kayla by Victoria Case stamps. Papers are K&Co

Sunday, 19 July 2009

Step away from the cute stamps!

Yes I put them down for a little while the other day to create this ATC for a vintage swap....
This is the front....
Made the backing card with a nice concoction of distress inks, solar gold radiant rain and moonshadow ink. Background is overstamped with brilliance coffee bean and then edged with a gold dabber. The images are by Stamp It australia, I think its Yvette quattro. I dont own the stamp which comes with 4 ladies on, I hired it wayyyy back in about 2005 so have several sheets of them which can now be classed as vintage lol! The flowers are from a woodware multi punch, I bought this at port sunny as I couldnt make my mind up what punches I wanted so I got one that punches several out at a time :D
The images are coloured with copics and I've swiped right round the white bits with antique linen distress ink.


Inside of the ATC


Wednesday, 20 August 2008

Tilda & Co Challenge - Cold as Ice

I really liked the idea of this challenge so I did it twice! Love all the DT's work, outstanding as always!
If you'd like a go at the challenges they are here http://magnoliachallengeblog.blogspot.com/

Anyways here's mine. First one is So Heavenly Tilda which was coloured using distress inks. Its on silver holographic paper and has 3 jewel brads.

This one is Christmas Edwin again painted in distress inks


Thursday, 31 July 2008

More Magnolias :-)

I've not been able to make much since Moonbeams was born, not because of her but because of Eefie! Sounds daft but I cant work when I finally manage to get them to sleep as the fuse in my lamp has blown and i keep forgetting to get some and fix it and cant root round in the garage that time of night when i remember! I must must must remember to fix lamp lol!


Also need to go the village and pick up my photo printer ink for Molly's thank you cards, they're ready but just need photos to put on them!


Anyhow, this is one I made for Michelle's birthday who is a chums 4 mums co-ordinator from Crewe. She has rescued horses so I thought she might like it :) Background is moonglow shadow ink (the purple one!) Bronte the horse was painted in distress inks.


This is one I made for my nan's birthday. Its my usual shadow inks and starburst stains only this time I stamped Tilda onto paper matching the background, cut out the top and trousers and glued them on.

This one a bit out of focus sorry, was a rush job! DD came home with this grey piece of card with some ribbon and wooden flowers superglued on and asked if I could do anything with it as it was their english teacher retiring. The kids had written happy retirment..... ummm not good for an english teacher lol! She then told me she needed it for the morning! Was up till 2am working on it for her but did it!


Thursday, 19 June 2008

Recent cards

OK I can't actually take the credit for this one although I helped a little hehe! This is Eefie's first crayon drawing which I thought would look great for a fathers day card. Looks like a red indian with feather and headband to me so WELL DONE EEFIE!
This is a stampbord domino book I recently made for the Something Different swap on our yahoo group. Its my first project like this, I've done a couple of half books before so this is my first full one. Its made with moonglow shadow ink, stamped with adirondack ink and glazed with added micro beads.


This is a birthday card I made for Rachael from my UKS team, I was experimentin' and like how it turned out. The background for the stamp I did by running the vintage photo inkpad round the edge, wetting it with a brush and gradually pushing the colour inwards. I like all the colours on it, moonglow shadow and ranger distress inks.

This is one I made DD's mate who's recently had a little boy. I used the cuttlebug with moonglow starburst stains daubed on and again its painted with distress inks. (I need more colours!)


This was made for Olive on our yahoo group for the teddy bear's picnic swap. Its the glitter acetate technique which I love doing but dont do very often anymore so thanks Olive, I enjoyed making it!

This is one I made for Benita for the IrRESISTable swap. It has the resist technique for the background. I tried using distress reinkers instead of inkpads and it went on like a dream so will definately switch to that in future. The butterfly is actually a rub on I've had for eons and "saved for best" I customised it a bit with sticky gems and added highlights with dimensional glaze and stickles glitter glue.


This is Arlyns birthday card - Shhhhh it isnt until Sunday ;) Its my favourite Tilda with flowers in her hair I coloured with distress inks only added lots more water for a more pastel effect. Then I've stamped round the edge with tapestry stamps and added dots of glitter and some real flowers in the corner.
This is Jack L's birthday card. This time its painted with versamagic (chalk) ink. Tapestry stamps again and the background is made with moonglow starburst stains. I liked how Tilda turned out on this one using chalk ink :)

This is flying off to Spain tomorrow as its for the yahoo groups Cutie Pie swap. Its on pink bazzil bling card with hero arts flowers and Tilda is painted this time with dee gruenigs blending blox.

And lastly this is one I've made for my 2 main midwives Alana and Helen as I wont get time after Molly Moo is here! I had Alana as a midwife with Eefie too so I've used Magnolia baby Alvin (how cute is he!) and Tilda with baby Tingla stamps painted with distress inks, marvy pens and adirondack ink. The lettering is a cuttlebug one - You're not the boss of me.


Hope you like :)

Thursday, 22 May 2008

3 new Magnolias

First up a new ATC (1 of 2). The background shows up quite nice in the pic, its moonglow starburst stains. Then I've watercoloured the image background using marvy ink & starburst stains and added flowersoft. The Tilda is watercoloured with ranger distress inks.


Next is a very glittery Party Tilda. Everything on it shimmers, the blouse and shoes are coloured with sakura stardust pen in clear. The blue background is starburst stains and its mounted on holographic silver. The letters are brilliance ink in red and I went over the top with stickles glitter glue in stardust :)


With this Tilda I stamped the image out again onto the same paper as the backing paper, cut the blouse out and glued it over the top of the watercoloured image.


Last but not least, the background is cuttlebug and I've run over it with starburst stains. Then I've stamped Tilda onto watercolour paper, masked it and stamped the fence behind. Its watercoloured with ranger distress inks.