Showing posts with label promarkers. Show all posts

Sunday, 4 October 2015

Halloween at Crafts and Me

Hello!!!  I'm back again with a new creation for Crafts & Me Halloween Challenge.  For this I went with monochrome and chose Elainia by Hannah Lynn who is a cute little Vampire.  I thought I had some black flowers but a rummage through my stash and I have everything but black!  I did find these Cala Lilies though which I thought went well with the theme (I think it could also be used as a gothy birthday card)
I've coloured with promarkers in cool greys.  For the hair which you might find a bit scary from the stamp I just flicked lines ending in black (use a fine nib or a tria marker for the extra fine lines)
The face and skin I used the blender, cool grey 1, 2 and 3.

The background papers are Crafts and Me Floral Fantasy Monotone.  I mounted on a shimmer white card and some black/violet core'denations card which is a black card stock you scratch the top layer off to reveal the colour "core" in this case a violet.  I've added some white pearls and mirror squares.


I'd like to enter into...

Creatalicious - Halloween
Crafts Galore Encore - Halloween
Noor! Designs UK - Halloween
Crafting with dragonflies - Anything goes
Hiding in my craft room - Monochromatic
Crafty Calender - Halloween
CraftyCatz - Fantasy/Fairy
Really Reasonable Ribbon - Halloween
Simply Papercraft - Anything goes
Stempelsonne Challenge - Anything goes
Clear it out - Anything goes (cala lilies must be 10 years old!)


Wednesday, 7 March 2012

Female relative/Mum at Passion for Promarkers and Things with wings at Crafts & Me

Well haven't I been a naughty blogger!  My new years resolution in tatters lol!  I just couldnt get on blogger last night and was in so much pain anyway I just scribbled away furiously instead :(  Back to the Drs on friday unless I ring at 8am tomorrow and try and grab a book on the day one, I hope so as the tablets he gave last week are about to run out eeeek!  Not that they *do* anything anyway but its a comfort thinking they might ease it off a little.

Got 2 cards to share with you tonight.  The first one is for Passion for Promarkers DT and the challenge is For a female relative/Mum.  I wanted to print a mothers day sentiment for this one but I completely ran out of card, not one sheet left so have been up to Strikes today and had a scribble on some of theirs and got one suitable for the digi papers I print and one suitable for colouring work.  I hope Letraset bring out that gorgeous new card they have in their new stamp packs soon as I'm itching to get hold of some more of that, its like silk and blends beautifully!

Crafty Emma's Store is sponsoring this week with a £10 voucher to spend there so rmember to use your promarkers/flexmarkers/tria or aquamarkers to be eligible!

For this I used a recently acquired Tilda stamp called Tilda spreading love and she's actually throwing hearts around but I thought that a bit valentineish so I used flowersoft instead.  I chose a turquoise colour theme as I didnt want it to appear too weddingish either lol!  I added a little heart charm to the bow (that really helps set it aside from valentines/weddings....!) and the making memories cherish border (Oh dear, blame the medication!) and a heart shaped doily (OK I'm amusing myself now!)  The papers are floral fantasy by Crafts and Me and I used some ancient button brads with some turquoise prima flowers.

I'd like to enter into...

Kaboodle doodles - Flowers
Stamps & Fun - One bow
Magnolia down under - buttons & bows
One stop craft - Button it
Crafty Emmas - Flower Frenzy


Next up is Crafts & Me and our challenge this week is Things with Wings.  Naturally as the shop is FULL of winged fairies, angels and creatures I selected a stamp that hasnt got wings only because I really really love Melody and wanted to colour her :)  This one is Fashion Melody by Lemon Shortbread.  I saw the rest of the DT had naturally gone with images that are fairies/angels so got a bit nervous but then Mona piped up that she was using Cali Girl which isnt either so safety in numbers ha!

As I'd run out of card for printing on I had a rummage through the ones I'd already printed off from the Floral Fantasy paper pack and went for one with hot pink flowers on which isn't a colour you'll see here too often, I do like to push the boat out sometimes :)  I wanted to keep this pretty simple mainly because I'd also run out of glue dots so flowers were out of the question but with papers like this in the background you dont *need* a lot of embellishment as the paper does the work for you.  I used some letratac to attach the butterflies :)

This particular paper has gorgeous hot pink flowers with some violet tones in the bottom corner so I picked those colours out and scribbled away adding a fold here and there and punched out little violet and holographic silver flowers for her brooch and added punched butterflies and some pink gems and 2 diddy pearls on her pockets.  The sentiment is from a stampman sheet and its matted on violet and holographic silver card.

I'd like to enter this into...

Pan Pastel UK - Stamped image
Papertake - Anything goes
That craft place - Anything goes


Sunday, 26 February 2012

Yippee a card!

Evening all!  Blogger let me on again so editting this post!  I have a card to share tonight yay!  I do often spend evenings just colouring and dont make full cards all the time but this is one that made it lol!

I've used the limited edition Raining Hearts Tilda and I'd actually planned to do her dress in glitter white so just wanted to add a touch of grey underneath in the shadows but you know how it is once you get colouring you kinda get carried away so she ended up grey and pink :D

I had some lovely pink Tim Holtz papers and put a mat on the front then I wanted to do half grey so used the very versatile Floral Fantasy papers in the greys from Crafts & Me HERE.   I've recently got some die cuts off a lovely lady on ebay called CAZ5555CARDS who sells small quantity beeeeeautiful die cuts for people like me who just like to try things and this one is the memory box cherish border which I inked up in spun sugar and worn lipstick and glued to the card using letratac which is great for delicate things like these.  I've punched out grey and pink butterflies and added a flower from wild orchid and organza ribbon.  Ive added glamour dust to the little hearts on Tilda and quite happy with this one for a change lol!

Thanks for stopping by :)


I'd like to enter this into...

Totally Tilda - Punches and die cuts
Magnolia stamp lovers - Punches
PanPastelUK - Ribbon


Sunday, 5 February 2012

A Maggie Valentines

Evening all!  How you been today?  No snow here boooo!  Been scribbling and tidying today as Ethan has his girlfriend coming round for tea (they're nearly 5 ya know!)  He's just so excited bless him!  Its 11pm and I just decided to clean my desk as when it gets *too* bad it irritates me so now I have everything off my desk on the flor behind me - so much for tidying up!  Oh well as I would say to my OH - Chaos Theory!  It will all come right and look tider than ever tomorrow ;)

Got a maggie valentines to show you tonight, I love this little image which is Ladybug Tilda from maybe a couple of years back but she's so cute :)  I went with a pink and grey theme to match the papers which are Tim Holtz and added some torn paper and stamped the word love and distressed the edges of the paper and image with pumice stone distress ink and also dyed a couple of the flowers with victorian velvet distress ink.
The swirly boingy things I think I saw these the other day in a packet with Magnolia on, well mine are from the works, well actually carols crafts which sell a lot of the embellishents the works sell ;)

Anyway thanks for stopping by, I' off to tidy up some more as it really is a mess lol!


Promarkers used:

Skin - Ivory, blush, coral, cinnamon
Hair - Pastel yellow, burnt sienna, cinnamon
Clothes - Ice grey 1, 3 & 4, sunkissed pink, dusky rose, antique pink


I'd like to enter into...

Just Magnolia - anything goes/valentines
Joanna Sheen Challenges - Love is in the air
Sarah Hurley - Love is all around
Magnolua down under - love is in the air
One stitch at a time - with love
Di's digi designs - Valentines
Gingerloft - Love s in the air
Bling it on - Love
Addicted to stamps - Valentines
By the cute & Girly - Love is in the air

Wednesday, 25 January 2012

Pink & Sparkly at Crafts and Me

Well we're over to Karen to host her first challenge at Crafts and Me this week and she has chosen the favourite theme of lots of us - Pink & Sparkly :D :D :D

For this I used the digi stamp by Hannah Lynn called Moonglow which I think will become a firm favourite with me as she has lovely lines to colour.  I went for just a few strands of a darker pink using mulberry and lighter pinks using baby pink and the pink lavender flexmarker on her hair.  Her skin is coloured with ivory, blush, coral, cinnamon, soft peach and cocoa and I think I used some rose pink on her cheeks!
All the white bits (on her top, flower and spine of wings) are glittered with glamour dust and the flowers are all glittered with stickles crystal.  The boingy things in the flowers already came glittered :)
Thats not green card on there BTW its holographic silver.  Isnt it funy how your tastes change, 3 years ago I used to despise holographic card now I love it!

Flowers are from wild orchid, the cute butterfly is by papermania and I've used a butterfly embossing folder which brand escapes me!

Hope you can come and join in Karens first pink and sparkly challenge over at Crafts & Me this week :)


I'd like to also enter my card into...

Tuesday, 24 January 2012

Passion for Promarkers - Recycle something

Evening All!  The new challenge this week over at Passion for Promarkers is to recycle something.  I was a bit stumped for this one having had a clearout before xmas until I remembered the belt my DD was getting rid of.  Its a chain belt filled with charms, get rid????  I don't think so lol!  I pilfered one of the metal hearts off it, cleaned it with blending solution then added wild plum distress ink to colour it to match the papers.  I then intended to paint a small amount of 3d gloss on it and add glamour dust but the nozzle was blocked so a bit of prodding with my poky tool and it started to flow so aimed over the heart and splodge!!  A massive blob came out and drowned it!  Not to be deterred I spread some glamour dust on a piece of card, picked the soaked heart up with my poky tool and gave it an all over dusting :)

The image I used is one of the new Tildas (cozy heart) from the 2012 sweet crazy love collection coloured with promarkers and I added 3d gloss (this time with a paintbrush!) and sprinkled with glamour dust,  I've added random crystal hearts and a little butterfly.

The inside is also decorated with lovely pink hearts papers and the card is cut with a go kreate dye.

Hope you can recycle something and come join us this week!  There is a prize of 4 digi's from Pink Gem Designs up for grabs!


I'd like to enter into...

Tuesday Throwdown - So charming
Cupcake Craft - All you need is love
Card Cupids - Valentines
Stampin sisters in christ - Make a heart stand out

Monday, 23 January 2012

2012 Promarker Tutorials - Teddy Bears (Teddy Bo)

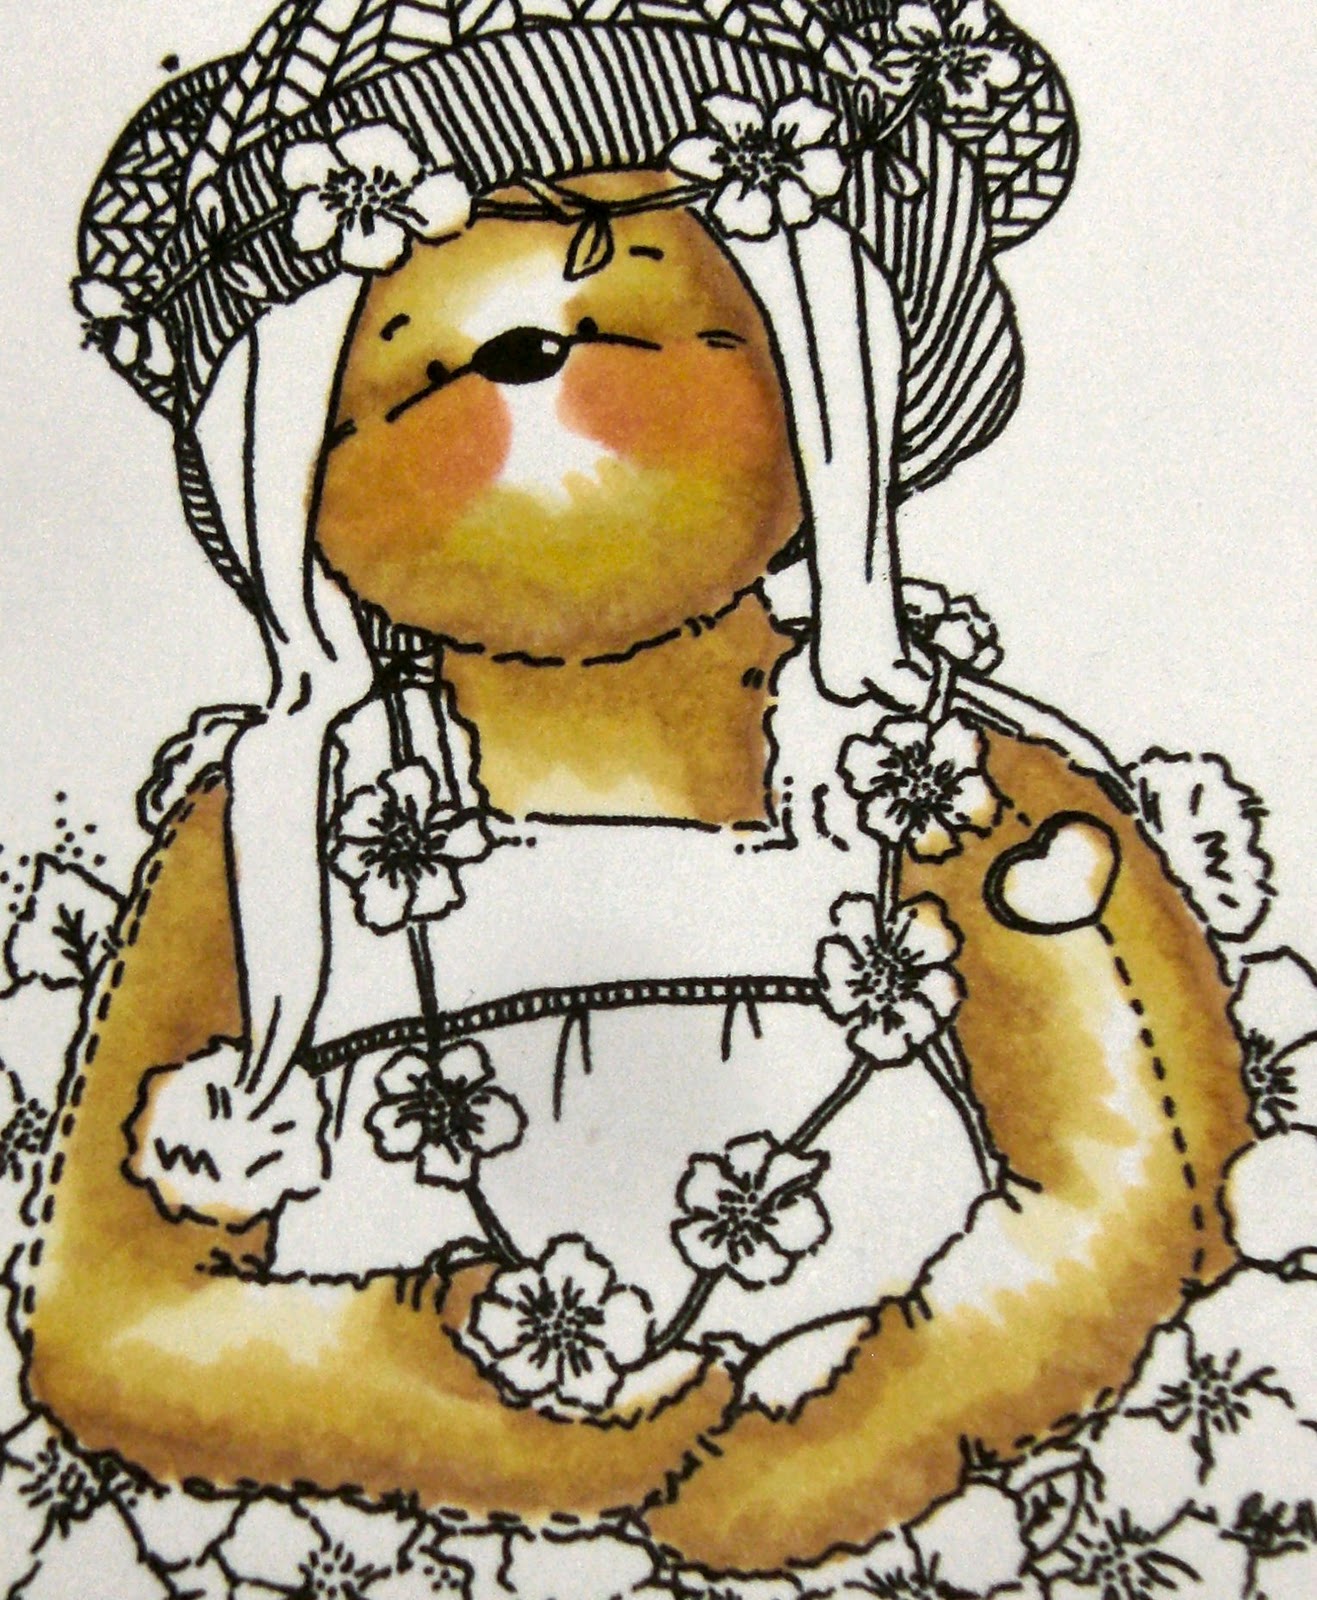
Evening all!  I'm back with another tutorial to share with you tonight and we're going to be looking at colouring teddy bears or more specifically Teddy Bo/Bea bears.  For this tutorial I have used Teddy Bea_075 (Daisy Chain)  I cant link direct to the image but if you want her then go to the TEDDY BO SHOP and click Teddy Bea store on the left hand menu and she's on page 5 and costs £1.65 with 25% off until 6th Feb if you use the code on the front page.

For colours there's no real right and wrong, simply select a light, mid and dark of combos that work well so for this I chose a yellowy brown as it gave her a golden glow :)

Promarkers I'm using today are...

PRIMROSE
PASTEL YELLOW
CINNAMON
SOFT PEACH FOR THE CHEEKS
SANDSTONE (INTERMEDIATE PART)
COCOA (INTERMEDIATE PART)


STEP 1 - Colouring most things including animals uses pretty much the same process, identifying your highlights and shadows.  From the hair tutorial I showed you how I do this by colouring with my lightest colour first to bring the image more to life so I can see the points easier.
Here I have used the lightest PRIMROSE and coloured in a large part leaving some points white at this stage. 

Next take your PASTEL YELLOW and go over most of your PRIMROSE just as you do for hair and leave a bit of the primrose and white showing where you want your hightlights.
On this image I have picked out above the eyes and on the muzzle, part of the left arm and chest.

In colouring fur and the like I colour in a slightly different way, I don't want smooth glossy features like you get with skin tones and hair I want it a bit rough looking so I scribble when I colour in fur.  Start from the outer edges and push the pen in towards your highlight points in a scribbly fashion, not unlike a kid colours if you're with me lol!

On this first pic I've used the primrose and pastel yellow.


STEP 2 - Take your CINNAMON and again starting from the outer edges of each section colour inwards over part of the pastel yellow you just coloured.


STEP 3 - Add some SOFT PEACH for cheeks on either side of the nose in the bit you left white.  You can be quite bold with this as it will blend in.
Next use your PRIMROSE to blend in all the colours.  Literally just scribble it on as we're not looking for glossy here.

STEP 4 - Add in more PASTEL YELLOW over your first layer to build up some depth.  Re-add some SOFT PEACH on the cheeks too.  You can see the pastel yellow clearer on where the mouth should be and how its scribbled on :)


STEP 5 - Again use your CINNAMON and add this to your darkest shadows.  Bring a line from the eye outwards and around the frame of the face, under the chin will be quite dark and the inside and ouside of the arms and around the paws. 


STEP 6 - Add a little more PASTEL YELLOW over the CINNAMON then use your PRIMROSE to blend it all in.  This is perfectly fine as it is, add a dot of white gel pen on the top of the cheeks if required but thats job done...


INTERMEDIATE

Now you've got the hang of that one and are identifying the shadows and highlights a little better we can add in another couple of colours


STEP 7 - If you're feeling confident you can add in an extra couple of colours so here I've added on some SANDSTONE.  That shade sits between the cinnamon and pastel yellow so add this on going over and past the parts you previously coloured with cinnamon.


STEP 8 - Now re-add some CINNAMON where you previously coloured.


STEP 9 - Here's the brave bit, add some COCOA around the very darkest parts so here it is the line on the eyes, down the edge of the face, under the chin, under the paws, inside and outside of the arms.  You dont have to do solid lines, just scribbles remember and if you miss a bit out thats good as it will give it a more natural look


STEP 10 - Add more PASTEL YELLOW and PRIMROSE in as you did in step 6 to blend them all in again.


STEP 11 - Give a final touch up with the COCOA whilst the ink is still wet and you're done!


Please do experiment around with colours as everyone has their preferences.  This one below uses SATIN, SANDSTONE and CINNAMON.  I think that would work better for Lily of the valley ones but thats my personal opinion so do experiment as you might like another combo more :)


And the finished article.  They always look better when you bring them all together :)


Wednesday, 18 January 2012

Some humour at Passion for Promarkers

Morning all!  I'm a day late posting this, couldnt get on PC last night but this card is very apt for that too lol!  I'm always late unless its something really important then I won't sleep for fear of being late!  This text stamp is me all over isnt it!  We want to see some humour at Passion for Promarkers this week with the winner receiving 4 digis from Pink Gem Designs

I sent this to Dot so I hope it raised a smile :)  Its Tilda waiting coloured with promarkers and flexmarkers :)  The text stamp is by Inky Antics in case you *really* need it like I do!


Thursday, 12 January 2012

2012 Promarker Tutorials - Jeans

Evening all!  We're looking at Jeans tonight!  If you missed the tutorial on RED HAIR then check it out here!  When colouring images you just need to be able to identify light and shade then as you get more experienced you'll become bolder and more fluent.  You'll still make mistakes, we ALL do but it a case of just understanding the foundations of how light moves.  Look at objects, clothes, peoples hair, look how the light catches it, identify the direction of the light source and try to transfer this to your design.  There are however different styles such as manga which had a much more pronounced shadow with light and dark points meeting in a straight severe line whereas in the kind of images we tend to favour its much more blended.

By the way did you notice there's going to be some NEW PROMARKER COLOURS? *Grabs card, sells kidney....* hehe cant wait!


Onto the jeans now.  I'm again using IZZY by Di's Digi Downloads and again I've done 2 versions as as recomended the other night in my promarker tips post HERE have a play around and keep a note of specific colour combos you favour.  Like red hair, jeans has such a huge range of shades so I favoured this particular combo. 


PROMARKERS USED

1. POWDER BLUE
2. DENIM BLUE
3. COOL GREY 4


STEP 1 - Looking at Izzy's jeans, identify the highlight points, her left leg is in front of the right, there is a bump on the bottom of the jeans on the right leg, her bum, zip and around the pockets are all going to be a little more raised.  Colour in with POWDER BLUE leaving some white coming up from the raised point on the right leg, the bumps on the back of the left leg and the front of the left leg, pockets and zip as shown.


STEP 2 - Same as the hair tutorial, add in your mid colour in this case DENIM BLUE and colour over most of your powder blue 


STEP 3 - Add in your darkest colour, COOL GREY 4 - If you dont have greys you could use a darker shade of blue such as China Blue, make sure they're of a similar shade, e.g. denim is in the blue/greys
Add this in the shadow points so you'll see her top overhangs so that will be a shadow, inside of the pockets, down the stiching of the leg, inside the right leg and bottom of the turn ups.


STEP 4 - Go back to your POWDER BLUE and colour over all of the image leaving a small amount of white to blend in your colours.


STEP 5 - Repeat Step 2 and 3 going a little further into the lighter shade this time

STEP 6 - Blend over it with your POWDER BLUE covering over your white this time (Remember when you get to the bits you left white to just do 1 or 2 strokes over it.  If you feel you put too much colour over you can give it a swipe with a blender pen to take some colour off.


INTERMEDIATE

Right guys and gals you happy with that?  This one will show you how to add a little bit more depth and an extra fold.  You'll start very similar to the previous image but be a bit braver leaving some white space.  Using your POWDER BLUE, leave a lot more white this time and a little extra bit on the bottom of the right leg, more on the back of the jeans, more on the left leg extending up to the top and below the pockets.


STEP 2 - As before adding in your DENIM BLUE covering most of the POWDER BLUE


STEP 3 - Compare the pics of Step 3 from 1st tutorial and you'll see theres lots more lines of shadow, using your COOL GREY 4, go underneath those folds on the back of the leg, inbetween the 2 white patches on the right leg and add a bit more shape to the turn ups.


STEP 4 - As before use your POWDER BLUE to blend the colours and go over most of the white leaving part of the highest points untouched (back of jeans, front of left leg and the 2 on right leg)


STEP 5 - Add in more of your DENIM as before pushing in over the previous layer leaving some of the powder blue showing.


STEP 6 - Give a 2nd layer of your COOL GREY 4 but a little narrower than the 1st layer in some parts.


STEP 7 - Go over the lot with your POWDER BLUE leaving the whitest points until last then youre done!


Have fun and remember to play around with colours, make a note of ones you like or ones that didnt blend well together.  This one below uses turquoise, marine and petrol (coloured in about 3 minutes lol!)


Tuesday, 10 January 2012

Girls just wanna have fun

Evening all!  Theres a new challenge this week over at Passion for Promarkers chosen by Gro and it is to Be inspired by a song.  For this I had a rummage through my images to see which one 'spoke' to me and this is the one that came out - she's SO Cyndi Lauper!
We have a fab prize up for grabs from Letraset too - one of their stamping kits!

The image is a rubber stamp by Hannah Lynn called Birthday Girl coloured with promarkers and flexmarkers with lots of added clear sakura stardust pen so its very sparkly.
I've used y new papermania papers, silver holographic card and blue paper from Bearly Mine with organza ribbon, a puffed heart charm and some sticky gems.


I'd lke to enter this into...

Crafty Emma - ANything goes
Card Crafters Circle - Make it colourful
Simply Create Too - More than 2 layers

Tuesday, 3 January 2012

Thanks at Passion for Promarkers

Morning all!  We're kicking off the New Year challenges at Passion for Promarkers with the theme 'Thanks' 


The prize on offer is from Letraset who are offering one of their stamping kits so get your thinking caps on!  As always you will need to use promarkers, aquamarkers, flexmarkers or tria to be eligible.

For this I used an image by Teddy Bo coloured with promarkers and flexmarkers.  The DP is by bearly mine designs. and I used a Martha stewart punch for the centre panel adding a length of holographic silver ribbon and a white organza bow.

I'd like to enter this into...

Teddy Bo challenges - Birthstone (December)
Incy Wincy - Anything goes
The Pink elephant - anything goes

Sunday, 1 January 2012

Happy New Year!

Morning all!  Hope you all had a great new year!  I went to bed with a headache and hadn't even touched a drop of alcohol lol!  Had a nice NYE playing on the Wii with my lad, we were doing Just Dance and he was slaughtering me until I held the remote properly and got some points for my efforts!  Should have got one of these ages ago as its really nice for the family to play each other instead of going off and doing individual things, the kids are playing cycling racing against each other at the moment :)  We all registered on the wii fit yesterday and it thinks I'm fat and old haha!  Need to lose a bit of weight me thinks, I'm not massive but a few pounds off wouldnt hurt.

Well this is my first post of the year with many more to come!  I've chosen a lovely little image by Di's Digi Downloads called Fairy & Bear, I do like this character range, very sweet.  I got some new papers the other day and chose a papermania stack which is pink so you'll be seeing lots of pink on here lol!  The large flower is also papermana from a co-ordinating range which I cut in half and added a die cut of vellum swirl.  I've coloured the image with promarkers and used a muted pink flexmarker to blend.  The pink promarkers I used for the dress were rose pink and antique pink with chestnut, umber, tan and pastel yellow for the hair, ivory, blush, soft peach and coral for the face and cinnamon, buttercup and ivory for the bear.


Would like to enter into...


Wednesday, 2 November 2011

Ultra Fine Promarkers and Flexmarkers Winners!

Evening all!  I have a couple of winners tonight :-)  Unfortunately the flexmarker prize wasn't claimed so I've redrawn it and the new winner picked by random.org is Number 20 which is Grenouille Greetings!  Well Done Lesley, please email me your address and I'll pop them in post x


Onto the winner of the Ultra Fine nib promarkers which have been kindly provided by the lovely peeps at Letraset and yes indeed I did use the Nature set!  I think I'm addicted to these lol!
The winner of a set of the nature ultra fine nibs picked by random.org is Number 1 - Clare Little Bear  Pop us an email with your details on and I'll pass it onto Letraset x

Well Done Ladies and thank you all for entering!

Tuesday, 1 November 2011

A colour challenge at Crafty Cardmakers

Afternoon all!  We're having a colour challenge over at Crafty Cardmakers this fortnight and we'd like to see you use the combo PINK/BROWN/CREAM on your designs - Yummmmy!  Theres a great prize from One Stop Card Crafts up for grabs so pop over and have a looksie at the team designs, a couple of gorgeous christmas ones there too!

For this I went with one of the ultra cute Teddy Bo digis, I'm loving these bears!  This one is called Daisy Chain.  I coloured it in one of the new promarker ultra fine sets, this one uses the Hair set which is Buttercup, Pastel Yellow, Ginger, Chestnut and Walnut.  I also used it on the card below and wanted to see how the colours would look on a bear too so yes they work very well so are a good buy.
The dress and flowers I coloured with flexmarkers and promarkers.

Would like to enter into...

The Pink Elephant - Distressing
Corrosive Challenge - Flourish
Pan Pastel UK - Distress it
The Squirrel & The Fox - Hats or Flowers
Simon says Stamp - Anything goes


This one I played with the hair set again and I know you all lke the close ups so have put one on for you lol!  Must admit the colours aren't one I would have put together but they work really really well and of course you can just use the buttercup and pastel yellow for a blonde, add in the ginger and a touch of chestnut for a more reddy tone or go for the brunette, lots of scope.  I used all of the colours on the hair here to give her nice shiny toned locks.  I again used flexmarkers and promarkers for the dress.  Again wanted to keep it simples with lots of white though not quite CAS its nearly there (just cant resist adding things!)  I simply scored the white card with my scoring blade and used a textured purple card (coredinatons) adding some silver bling and white flowers.

Image is Lady of Opal by Crafts and Me that I put into a square frame with rounded corners and cut out letting the hair flow outside the lines.

Would like to enter into...

Craft your passion - BINGO (Flowers, bling CYP Free)
Pollycraft - ANything goes
Paper Playtime - Anything Goes (Present)
Dream Valley - Anything goes
Kenny K - Glitter & Bling
Crafts 4 Eternity - Mystical Magical (2nd entry)
Hannah & Friends - Glitter


Thanks for stopping by!