Showing posts with label how to colour hair with promarkers. Show all posts

Tuesday, 1 June 2010

Jill said "Hey Vix, how'd you fancy...."

Jill from The Stampman likes to challenge her brood from time to time and this time as I was helping pack up following Port Sunny Jill says, "Hey Vix, how'd you fancy having a play with this?" and hands me a packet. The packet is some 12x12 sheets of Claudine Hellmuth sticky back CANVAS. Canvas I ask you!! Jill says maybe play with your starburst stains offering some helpful advice....


Yesterday I had a bit of a rampage and tidy up and I like feeling new and fresh around the house and I took out a sheet of this sticky back canvas and thought Hmmmm, hmmmm. Had a quick flick round some challenges to inspire me and decided I wanted to use my promarkers but not only that to colour "The Eyes" in skin tones as well I'm challenging myself using something new so I think I'm pretty good at colouring The Eyes in greyscale and have never actually tried it regular colours yet. Now to do The Eyes the way I do it requires a huge amount of the blender so this was no different only normally I use whisper white cardstock which lets the colours float around a bit so I can manipulate them, on canvas it doesn't, put a promarker on and it spreads like wildfire so I just adjust the way I colour to allow for the different surface. Its quite stiff so you can punch it and shape it too so watch this space for more playing with it!

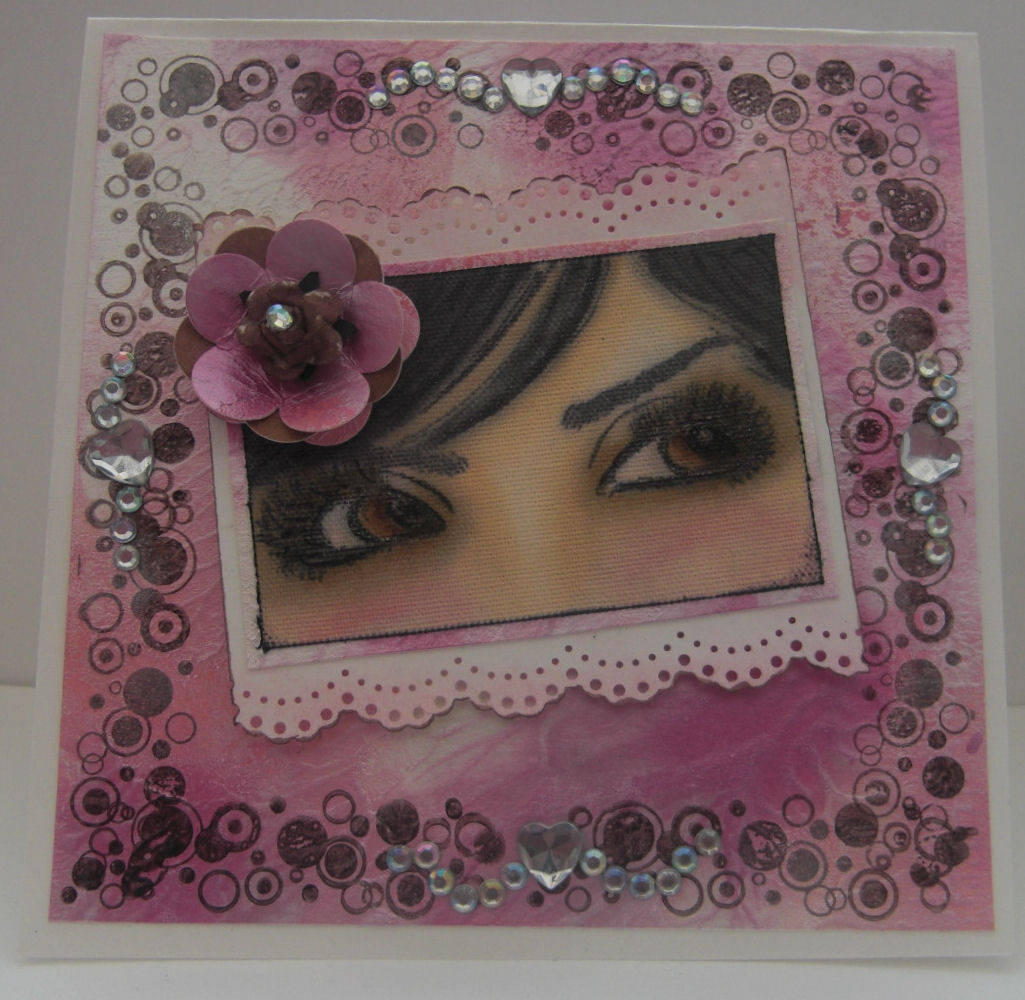
And as I was in one of "those" moods I also made the background with luna lights paints I've had forever and overstamped with one of the bubbles stamps from the same set as the eyes (Alluring Ladies by Tracey Coates available at The Stampman)
I was actually going to layer and whatnot but once I'd done the stamping on the luna lights background I thought it looked quite sweet as is :)

So the image is indeed coloured with Promarkers on canvas using the blender pen and also some help from adirondack blending solution, I've also used sakura stardust pens in black and clear and smudged them. The flower is made from leftover luna light background and moonshadow ink punched out and I've used a Martha Stewart punch on some white card sprayed with iridescent gold glimmer mist. Added some sparkly hearts and gems (the hearts are from the papermill)

So Jill did I pass the challenge (Blows raspberry!)

Entering into...

Sir Stampalot - Punch It
Mixed Media Monday - Personal symbols & myths
One Stitch at a time - Something new
Crafty Creations - Favourite Stamp


Thursday, 20 May 2010

Promarker Tutorial 2 - Hair

PLEASE ALSO SEE MY NEW 2012 SERIES OF PROMARKER TUTORIALS HERE

Following on from last weeks tutorial on skin & eyes which is here we're going to move onto the hair! I think once you've mastered these you can colour anything as its all in the blending and colour selection.


You can use any colours for hair but for dark brown as in this image I used...

A light colour for the blender i.e vanilla

A little bit darker i.e Caramel


A medium shade i.e burnt sienna


A dark shade i.e walnut


With hair and clothes you just need to identify highlight and lowlight points. In this example the highlight points on the hair look like bumps and the lowlights are dips.


Colour in your hair with your lightest colour (VANILLA) and leave the highlight points white as shown below.


Next take your little bit darker shade in this case CARAMEL and colour over nearly all of your base colour (VANILLA) leaving just a little bit showing.


Take your medium shade colour (BURNT SIENNA) and colour over most of your image again leaving part of the previous two colours showing.


Go back to your lightest colour (VANILLA) and colour right over the hair again and push the darker shades gradually into the white highlights you left. With a large highlight do this gradually and leave some white showing still, with a smaller highlight run right over it with the vanilla as seen on the smaller highlights at the bottom of the hair.


See how the vanilla washes the colour out and starts blending them together?


Next take your darkest shade (WALNUT) and colour onto the hair leaving quite big bands of the blended colours showing as shown below. The darkest colours really spread out when you blend them so if you only leave a small highlight point, when you blend it will drag too much of the dark colour over and disappear.


Blend this in with the VANILLA again pushing into the highlight points gradually.


Add more of your darkest colour and repeat this as necessary and continue blending in with the vanilla. I usually do this 2 or 3 times then when I'm happy with it I completely cover the white bits once with the vanilla and touch up the very lowest points with the walnut.


Here the hair is completed covering the white completely so that it blends in completely and looks quite natural. If you wanted to do blondes, reds, blacks or lighter browns just follow the same principal of lights, mid and dark so light blonde hair for example you could use ivory, primrose, buttercup and vanilla as the darkest.


You can also drop the 2nd lightest colour if you wish (Its a personal preference of mine as a way of making the colours more vibrant) so could do this without the caramel for example and just use vanilla, burnt sienna and walnut.


You can add sparkly bits with sakura stardust pens, copic spica or glamour dust and a glue pen (which I've done over a lot of the image here)

Blue hair & fantasy film wings with lots of sparkly bits added with a glue pen and glamour dust.

And the finished Tilda with lots of sparkly bits!

Hope you've enjoyed the tutorials and if there is anything you get stuck on just shout :)
Have a play with your own colour combos to find what appeals to you so stamp yourself some images out and just colour in a part of hair and write underneath what colours you used as if you like it you'll remember next time.
And the completed image folowing the same principals with the blending. The following one is the same with blue hair. Background was made with distress inks and a blending tool.