
First up we're going to use distress inks. Now you don't have to use distress you can use all kinds of ink but make sure its a dye ink not pigment as pigment is thick and will cover your stamping.
First off stamp your image in a waterproof ink such as stazon then take a light colour inkpad (I've used Spun Sugar distress ink.) Swipe the inkpad right over the image building up a good coverage of colour.
 When you've built up a good coverage of colour give it a rub with some kitchen towel to even it out and dry it off.

Take a darker distress inkpad and water colour in the hair (I used Victorian Velvet) and use a pink colour such as tattered rose for the flesh. Simply dab your inkpad down onto a non porous surface like a craft mat or piece of acetate and pick up the colour with your brush.
 If an area seems too dark then wipe the brush clean of ink and just use water (or sparkly water!) to wash out areas you want lighter or highlighted. I also dab quickly with a piece of kitchen roll to remove excess water and colour.
You should now be looking something like below, see the sparkle from the water :D
 Continue colouring your image, I've used the stargazers paints to colour in the moon.
Next I've used a blue distress ink (chipped sapphire) dabbed onto a blending tool and starting OFF the paper start bringing the colour inwards towards the image with a small circular motion.
 Let everything dry and trim down to suit (Mine is ATC size) I've also edged the image with a gold dabber paint which I've also dabbed lightly onto the flowers.
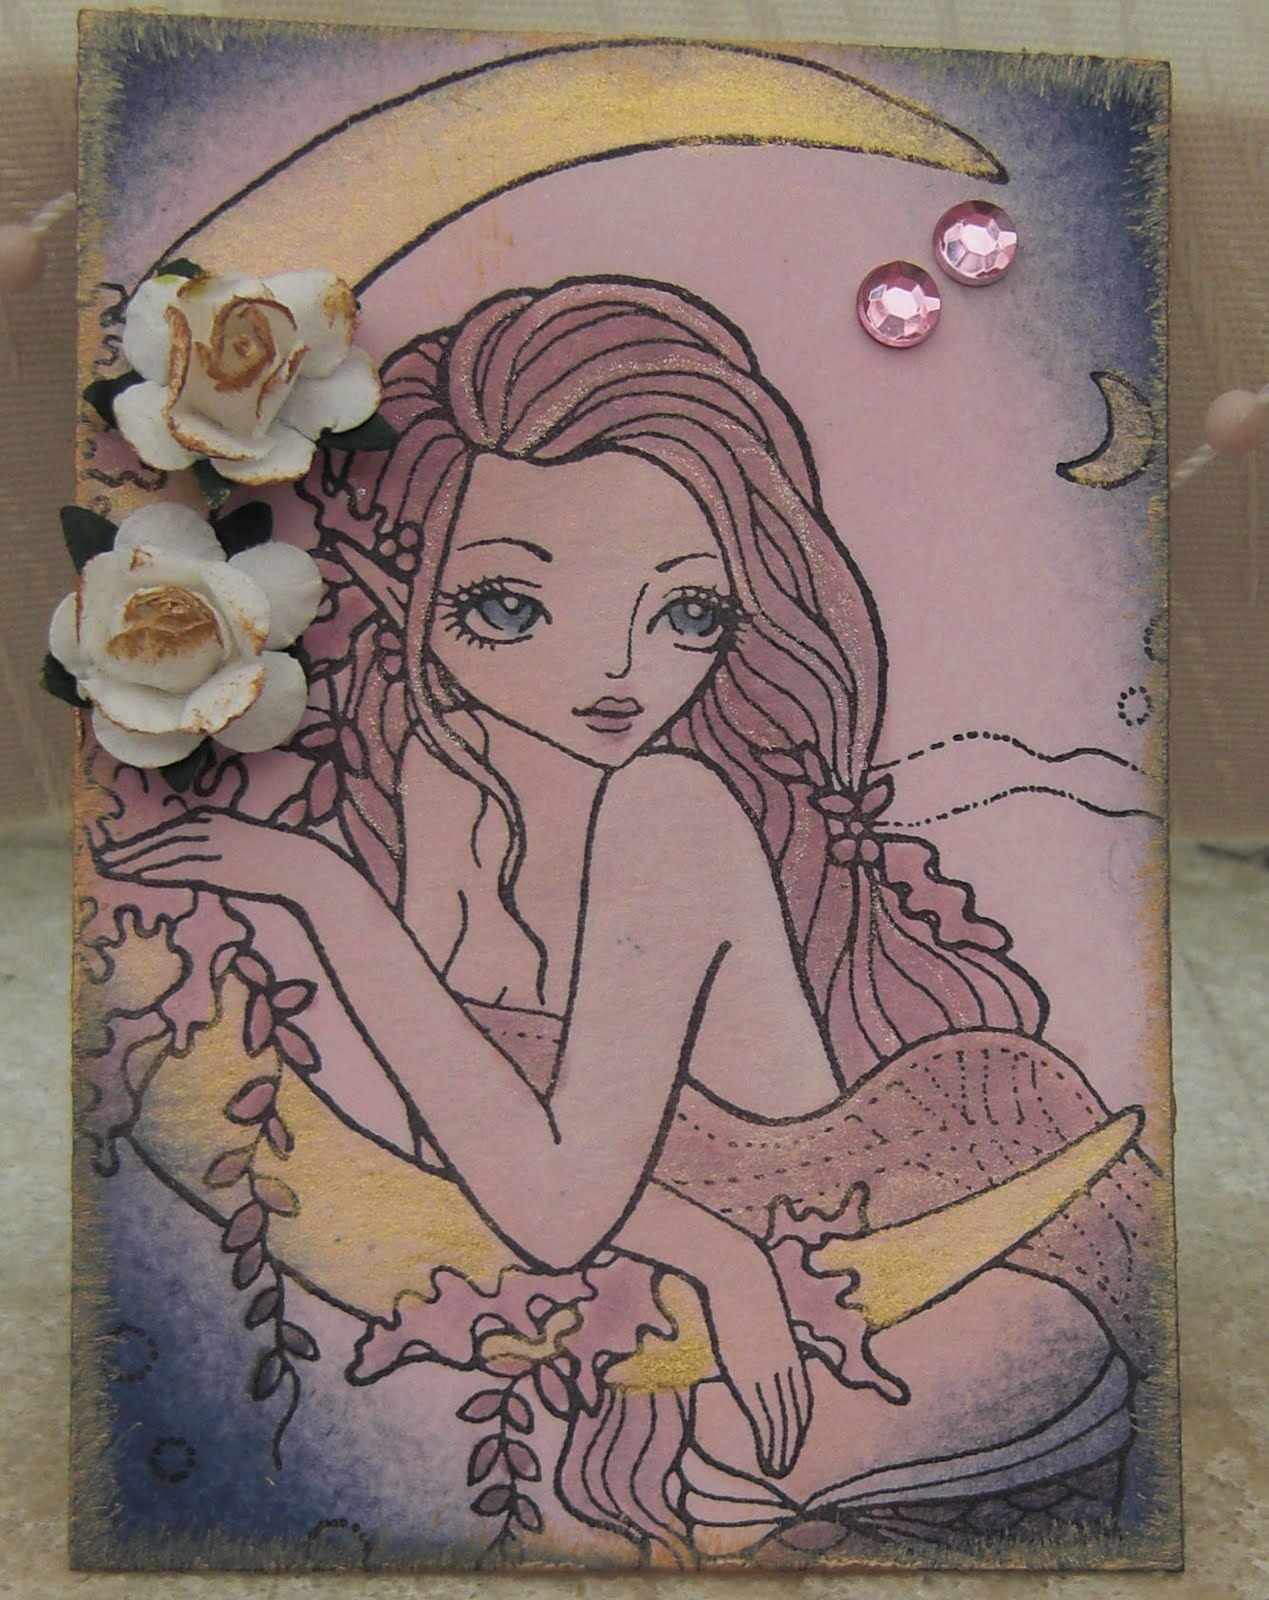 Next one is using just the stargazers watercolor palette to colour in the image. They work on light and dark card for different effects. The palette does cost around £20 but I've had mine since 2004, used often and not even a third of the way used! There is also a little mixing well in the centre and this set has all the primaries with black and white so a huge range of colour is available from one set. I'll also show you a little trick with it in a few days when I'm less manic lol!
For this one I've stamped onto black card and embossed with a white embossing powder. I actually think this looks quite good as it is for monotone cards!

Ive then used the stargazers watercolours to colour in the image. It doesn't photograph too well but when you turn the card all the colours flash up like the pink for the skin (there is a red and white in the palette, add a touch of bronze and you have a skin tone) The white on the moon is dazzling and everything sparkles :) :) :) :)
Add a little bit of embellishment and bling bling and you have another topper ready for a card or made into an ATC in 10 minutes flat!
 Hope these have been of some use to you and shown you alternatives to marker pens :)
9 comments:
Nice clear instructions thanks! xx Jenny xx http://myinkyhands-jennifer.blogspot.com
Great techniques - thanks for sharing those!! Juliex
gorgeous!! thanks for sharing your tips and techniques! Love the beautiful soft colours of your first example! hugs Juls
Fab tutorial, thank you for sharing. Yet another technique to add to my list of things to try. x
What a brilliant tutorial. Thanks for Sharing. Hugs Rita xx
Love the first one you have done Vix not sure about the negative one, but that is just me
Looks great! I'll have to have a go at that... when I get the time... lol. I doubt it will turn out anywhere near as good as yours though.
Meesh. xx
Beautiful
Ruth x
Thanks for sharing!! Great techniques!! Hope you have a great weekend!!
Hugs:)
Angela
Post a Comment